This tutorial demonstrates how to set up an email auto-responder in Managed WordPress, a useful tool for automatically sending a pre-defined reply to incoming emails. Ideal for notifying senders when you’re unavailable or providing immediate automated responses, this guide will walk you through selecting a domain, choosing a user, and configuring the auto-responder settings.
Whether for vacation notices or customer service responses, this step-by-step process makes creating an auto-responder straightforward and effective.
Set up an email auto-responder
An email auto-responder is a convenient feature that sends automated replies to incoming emails.
-
Select the domain: Log into your Hosting Platform and choose the domain where you want to add the auto-responder. Select the domain name from the drop-down box in the top-left corner of the left menu.
-
Navigate to user management: Click on Edit Users. This option allows you to manage the user accounts associated with the selected domain.
-
Choose an email account: From the list of users, click on the name of the account for which you want to set up the auto-responder.
-
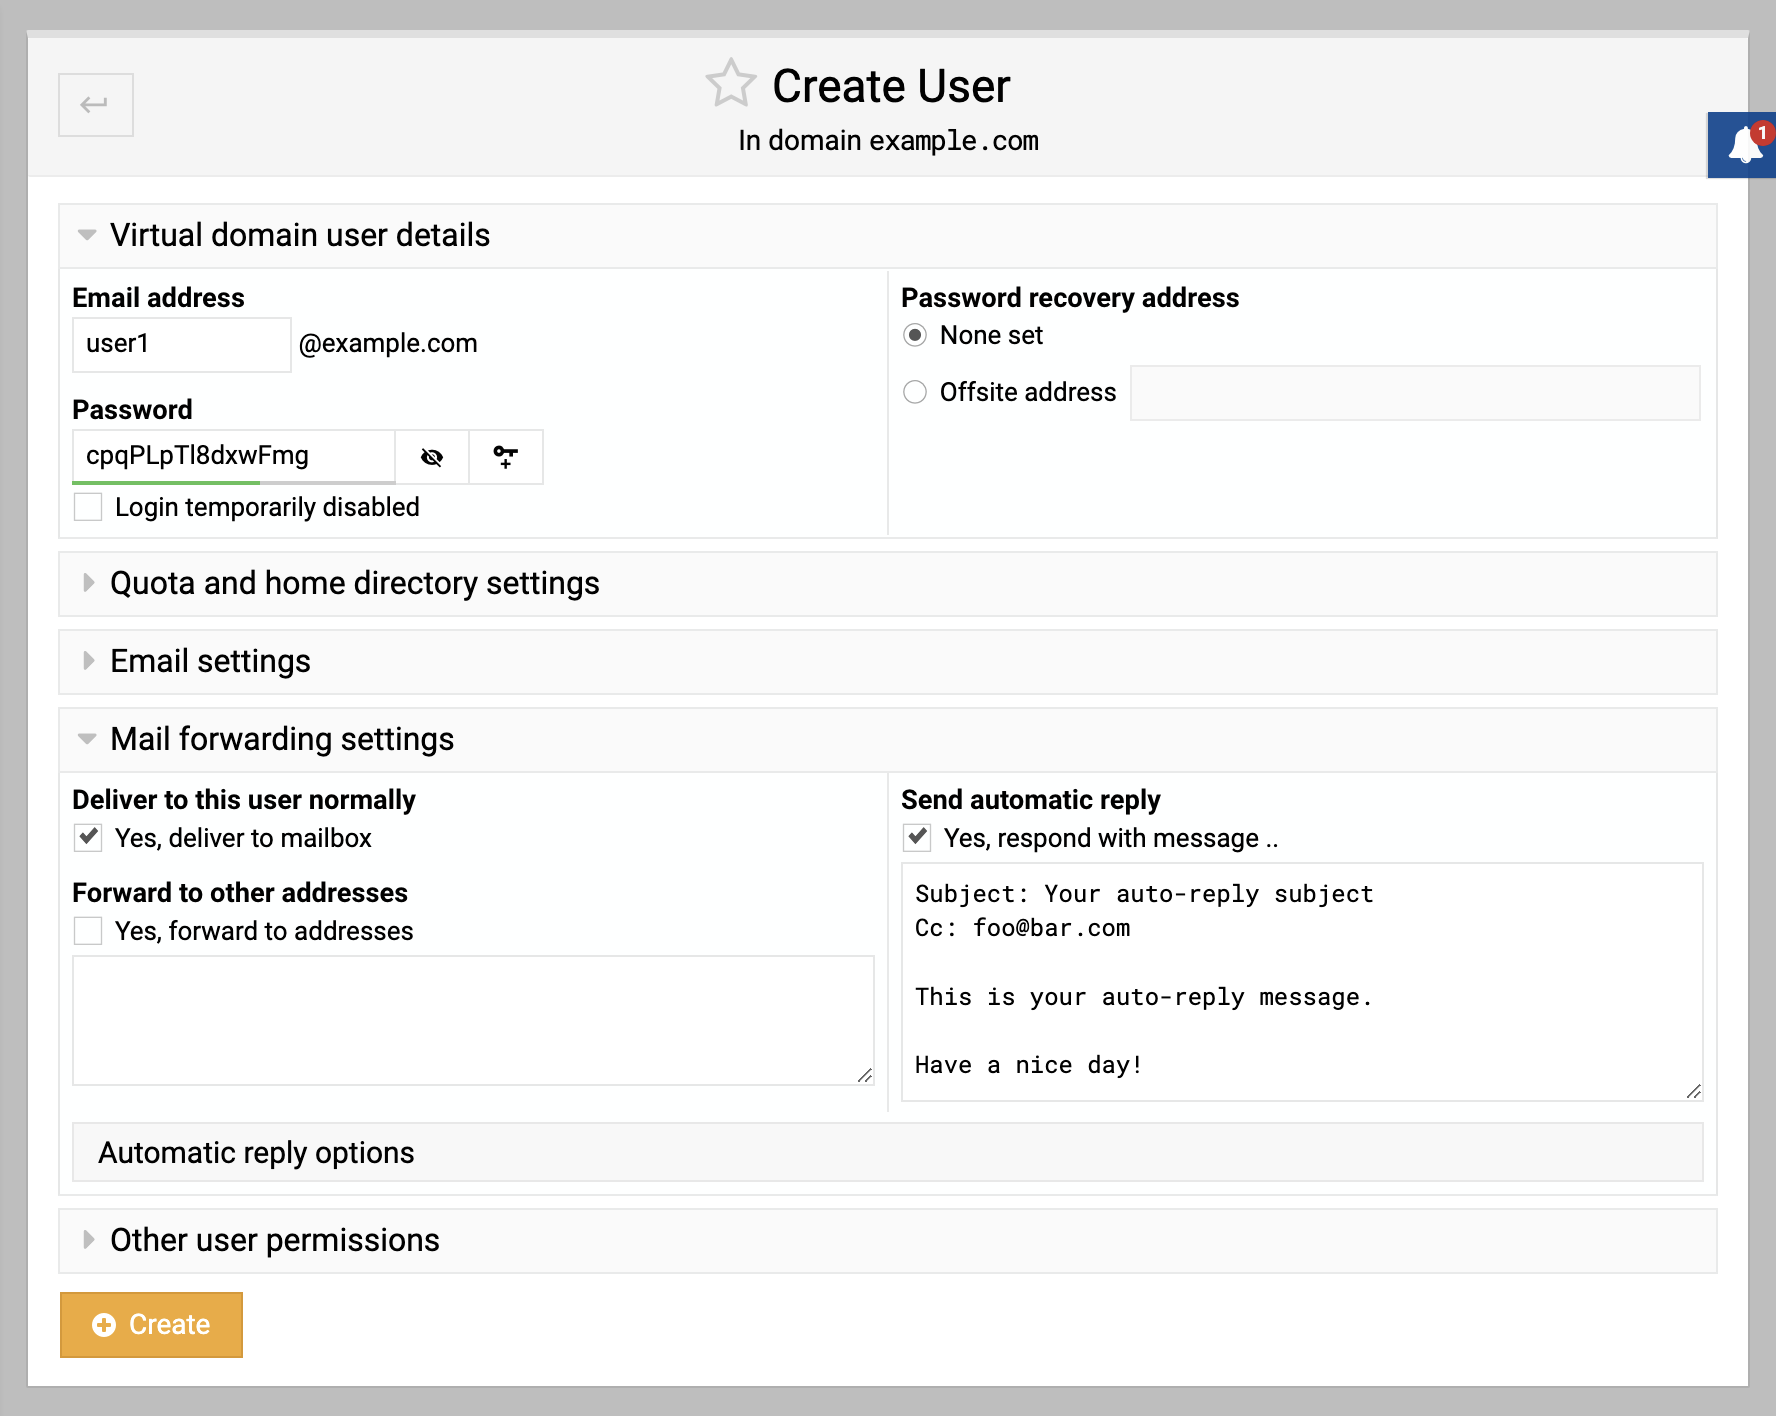
Access mail forwarding settings: In the user’s settings, click on Mail forwarding settings. Here, you will find the options for configuring the auto-responder:
-
Enable auto-responder: Check the box next to Send automatic reply. This activates the auto-responder feature for the selected email account.
-
Compose your message: In the text area below Send automatic reply, enter the message you wish to be sent automatically. You can use plain text or HTML (start the message with
<HTML>for HTML formatting). -
Save the settings: Click Save to apply your auto-responder settings. The configured message will now be sent as an automatic reply to any incoming email until the Send automatic reply option is unchecked.
By setting up an auto-responder, you ensure that every sender receives an immediate response, even when you’re not available to reply in person. This feature is especially useful for out-of-office notifications or as an instant acknowledgment for customer inquiries.
